Serving a HLS Webcam Stream With Raspberry Pi Source
We already know how to stream from you Raspberry Pi. But where should we stream to? If you want to distribute the stream or make it available on the internet, serving it from a server is an option that also gives you a lot of flexibility when it comes to post processing. The Raspberry Pi doesn’t have much processing power and if you want to do something fancy, chances are it won’t work on a Pi.
In this article we set up a Raspberry Pi to stream to a server somewhere on the internet which then sharpens the stream, adds a logo on top and makes it available on a minimal webpage.
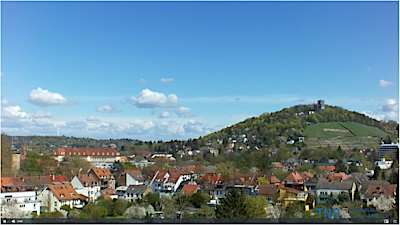
There is also a demo webcam showing the Turmberg in Karlsruhe, Germany:
Prerequisites
Of course we need a Raspberry Pi and a camera module for this setup. I use a Raspi 3B+ and a HQ Camera Module. Although it’s not as good as the newer camera module 3, I can fit a lens with the right focal length for my purposes.
We also need a server somewhere on the web to post process the stream and serve the stream. I use a Standard_F2s_v24 Azure VM which can just about handle the amount of post processing we apply. We assume that the address of our server is mystreamer.com.
For this article we use Raspi OS on the Raspi and Debian on the server.
Codecs
We use RTMP to stream our video from the Raspberry Pi to the server on the internet. RTMP is widely used as an ingestion protocol, i.e. for the popular streaming platform Twitch. With a direct TCP connection it is relatively low latency but requires constant bandwidth between client and server.
To distribute the stream from our server we use HLS. In contrast to RTMP it works via HTTP. The server provides small chunks of video as files and the client downloads them independently from another. This method is more suitable for distribution than RTMP as it handles bandwidth fluctuations better and a webserver already can handle a large amount of clients. Although there are mods to do the same with RTMP like nginx-rtmp-module for nginx.
Raspberry Pi
We let systemd manage the stream task. We add a systemd unit file and the script that starts the stream. There are several options for streaming from a Raspberry Pi. We use libcamera. But first we have to install the necessary packages:
apt install libcamera-app libcamera-tools |
The we add our unit file that also automatically restarts the stream if it fails:
[Unit] |
And finally the script that starts the stream. You can play around with the values for exposure, bitrate, codec, etc… ;. The following ones worked for me. It is important however to use libav as output library and target our streaming server via RTMP.
|
Server
Our server receives the RTMP stream from the client, adds some sharpening and a logo and saves the output in HLS format to the root folder of our webserver.
RTMP to HLS Conversion
FFmpeg is the only package we need to receive, convert and post process the stream:
apt install ffmpeg |
Again, we use systemd to manage the conversion script for us.
[Unit] |
The ffmpeg task that converts our RTMP stream to HLS deserves some explanation. First, we have two inputs: The RTMP stream for which ffmpeg listens to a tcp socket:
-listen 1 -f flv -i rtmp://0.0.0.0:3334/live/stream |
And an image file that contains the logo we want to lay over the stream:
-i /usr/local/share/your_logo.png |
Next, we sharpen the RTMP stream with unsharp mask and overlay the logo:
-filter_complex "[0] unsharp=3:3:1.1:3:3:0.1 [a];[1]scale=w=300:h=48 [b];[a][b] overlay=W-400:H-80 [out];[out]format=yuv420p" |
In cleartext, this filter does this: Get the first input (RTMP stream) and sharpen it using unsharp mask then label it a. Get the second input (logo), scale it to 300x48 pixel and label it b. Then take a and b and lay b over a at the lower right corner. Label the output out. Then take out, change the format to the correct input format for the h.264 encoder and pass on the result.
The result is then encoded in h.264 using the ultrafast preset and a maximum bitrate of 3Mbit/s. All audio is discarded. It will still use a lot of CPU power, though:
-framerate 30 -codec:v libx264 -preset ultrafast -profile:v high -level:v 4.2 -crf 22 -maxrate 3M -bufsize 6M -an |
Finally we package the result as HLS stream files and write them to the webserver root. We allow ffmpeg to delete video chunks that are too old and set the duration of a chunk to 2 seconds.
-f hls -hls_time 2 -hls_list_size 2 -hls_flags independent_segments+delete_segments -hls_segment_type mpegts -master_pl_name master.m3u8 /srv/data/nginx/web/stream_%v.m3u8 |
And this is the final script:
|
Webserver and Index Page
Now we can distribute our stream. We will use nginx:
apt install nginx |
In its default configuration nginx will serve the contents of /var/www/html/. Although we could just point VLC or another stream player to the stream index file a HTML page is more convenient and can be accessed via browser.
HLS streams are around for quite some time but only Safari opens them natively. For the other browsers we use video.js, a small library that creates a media player on our page. An example for a minimal HTML page that serves the stream would be:
|
Demo Stream
To showcase this explanation there is a webcam showing the Turmberg in Karlsruhe, Germany.
